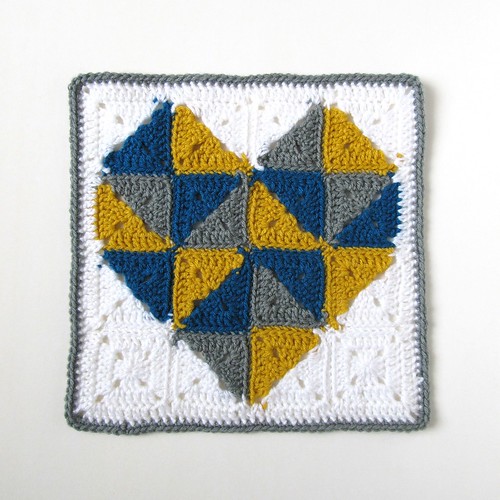
Do you know what I love? Triangles, color-blocking, primary colors... oh yeah, and you guys!! Because I love all of these things, and it's almost Valentine's Day, I thought I'd make a heart crochet block to share with you! I've also made this block to join in Claire's, from
Far From Harm Farm (one of my favorite blogs, so you should check it out!), Making Winter 2013. I don't know about you guys, but here winter has made a bit of a resurgence, so making this block has made my winter a little brighter and happier, especially since I've made it to show you all how much I love you taking the time to read and comment on my blog! I love you guys!!
 |
| (This block is also the first thing I made with my new crochet hook that I reviewed in the last post!) |
This crochet block, is comprised of 16 squares that are 2 rounds each. (I used worsted weight yarn and a 6mm hook, which made my block 12 1/4 inches square.) If you'd like to make one, you could use any weight yarn and an appropriately sized hook, your favorite colors (perhaps more traditional Valentine's Day colors?) and the following instructions (which are in US crochet terms):
The 16 squares include:
2 solid squares in your background color (mine is white)
8 two-color squares with 1 color being your background color and the other a heart color (example: white/blue)
6 two-color squares with both colors being your heart colors (example: grey/yellow)
You may want to sketch out the block (with the picture of my finished one for reference) for the placement of your colors! (Still with me?)
Let's start with the solid square (you'll make two total):
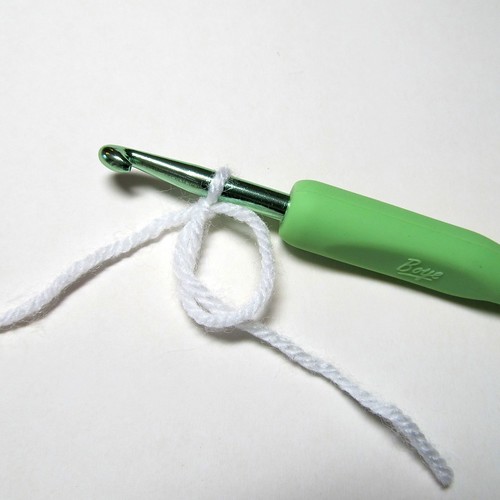 |
| Start with a magic (adjustable) ring |
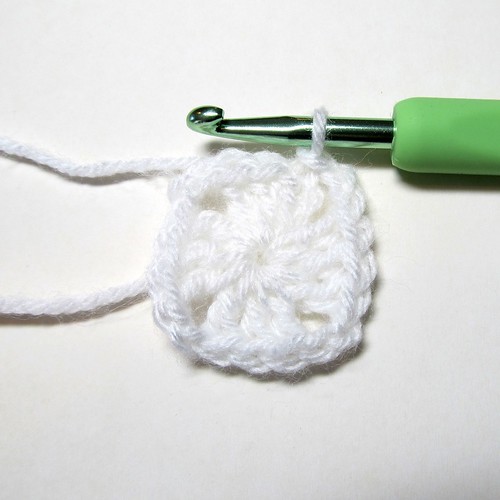 |
| Round 1- Ch 3, 2 dc, ch 2, *3 dc, ch 2, repeat from * twice, sl st to top of ch 3 |
 |
| Round 2- Ch 3, dc in next two stitches, (2 dc, ch 2, 2 dc) in corner space, *dc in next 3 stitches, (2 dc, ch 2, 2 dc) in corner space, repeat from * twice, sl st to top of ch 3, fasten off. |
 |
| Here's your finished solid background square (make two, one for each bottom corner of the block). |
Now for the two-color squares:
 |
With first color, start with magic ring.
Round 1- Ch 3, 2 dc, ch 2, 3 dc, ch 1, pull second color through loop on hook (this creates a second ch with your first color) DO NOT CUT FIRST COLOR... |
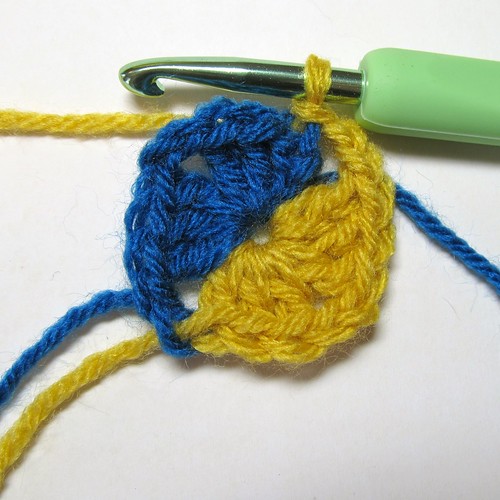 |
| now with second color, 3 dc, ch 2, 3 dc, ch 2, sl st to top of ch 3 |
 |
| Round 2- Turn block over (we will now consider this the "right side"), in corner space- (sl st, ch 3, 1 dc), 1 dc in next 3 stitches, (2 dc, ch 2, 2 dc) in corner space, 1 dc in next 3 stitches... |
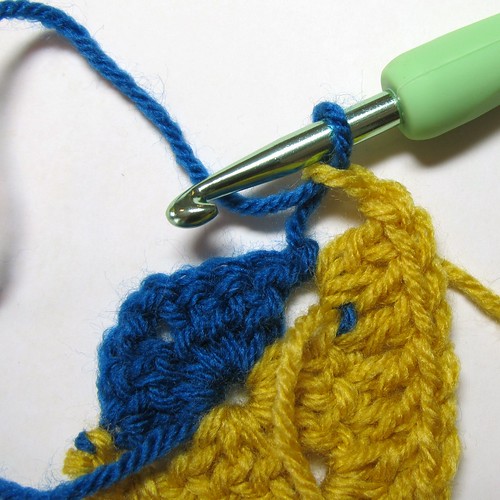 |
| in corner space- 2 dc, ch 1, pull first color from Round 1 through loop on hook (this makes second chain with color 2)... |
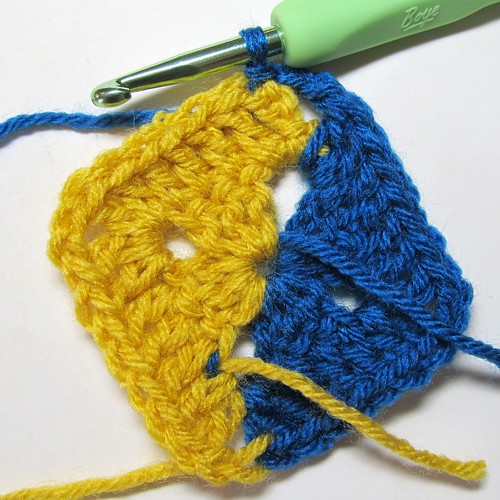 |
| 2 dc in same corner space, 1 dc in next 3 stitches, (2 dc, ch 2, 2 dc) in corner space, 1 dc in next 3 stitches, in corner space- 2 dc, ch 2, sl st to top of ch 3, fasten off (both colors). |
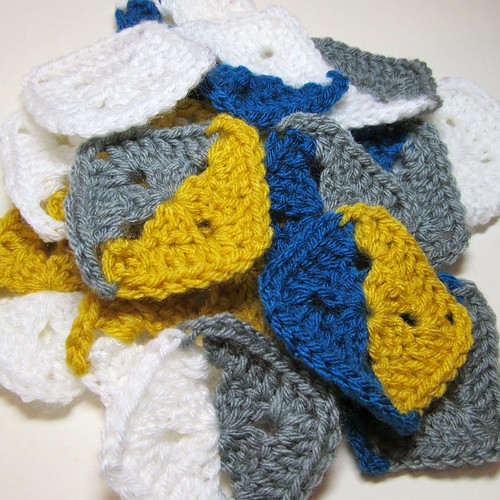 |
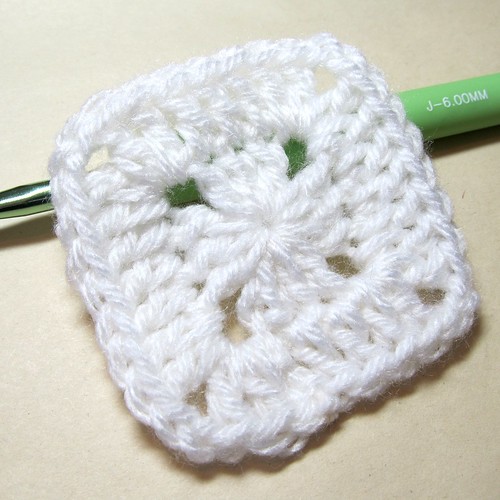
| Finish all 16 of your squares, and sew in those pesky ends! |
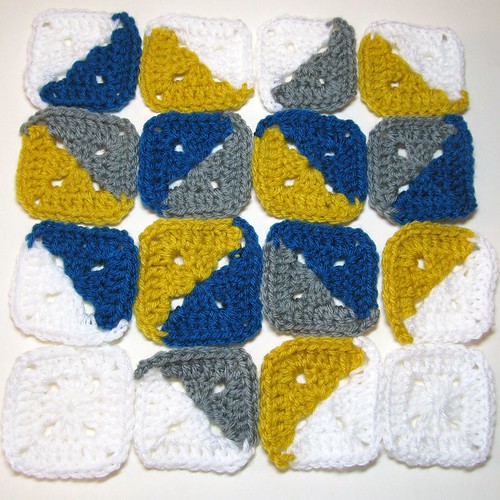 |
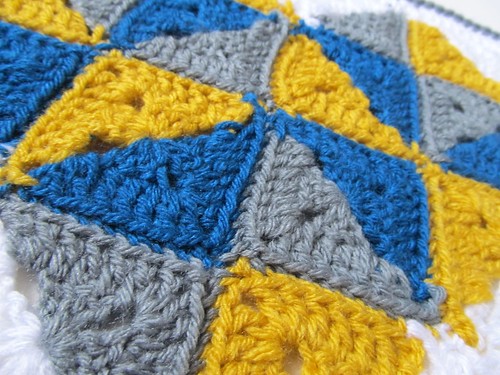
| Lay out all your blocks in the right places. Join squares into rows and then join rows to rows! For joining I placed right sides together and whip stitched through back loops. (You may want to join in your preferred way! Next time I may try whipstitching through both loops as I liked the look of the back of the square [which you can see in the last picture of this post]) |
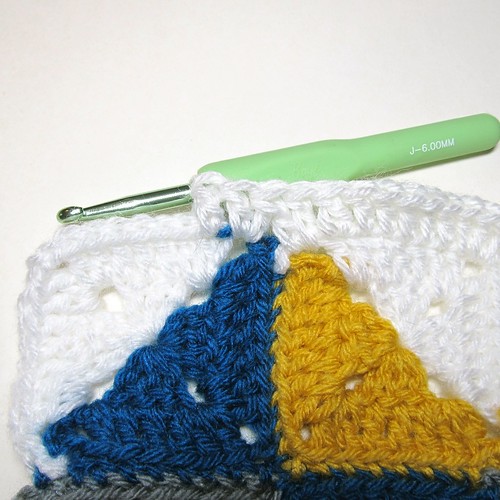 |
After the squares are joined, do a round of double crochet around the entire block. 1 dc in each stitch, (2 dc, ch 2, 2 dc) in each of the four corners, and on the sides where two squares' corners meet: (1 dc in first corner space, dc2together* over same space and second corner space, 1 dc in second corner space)
*Leave last loop of both double crochets on hook, yarn over, and work off all three loops at once. |
 |
| Finish with a border of single crochet. 1 sc in each stitch around, and 3 sc in each of the four corners. I then recommend blocking your finished block to make it nice and square. |
 |
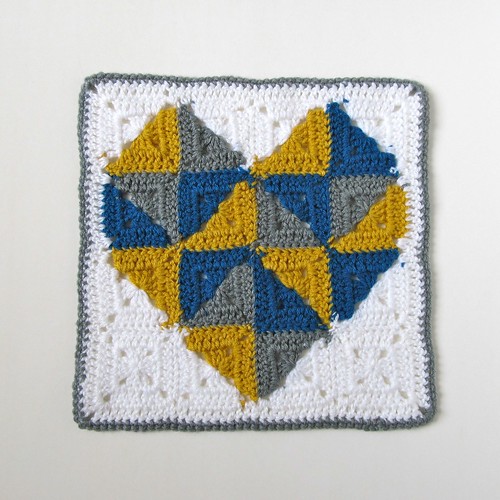
| You're done! Enjoy your hard work! |
 |
| Here's the back of the block, which I like as much or more than the front! The joins ended up looking a little cleaner. Maybe with a contrasting color for joining, whipstitching through both loops could make the hand stitching a neat design element! |
You could even take this idea further by making each square larger than just two rounds. By following the same pattern, (1 dc in each stitch and [2 dc, ch 2, 2 dc] in each corner, you could make a square as many rounds as you'd like! With bigger squares, you might be able to make an afghan with 16 squares!
If you end up trying this block and run into any problems let me know!!! And I'll say it one more time: "I love you guys!!"

This is simply fantastic Kate!!!!!Love it, love it, love it!!!!!!!
ReplyDelete....as I love you!!!!
thank you!!!!
xxxxx Ale
What a fun pattern made with your favourite triangles in time for Valentine's Day! How nice to do a tutorial with your super new green-handled hook which doesn't have its size in millimetres!
ReplyDeleteHave a great crochet weekend and look at winter from the inside!
Lovely, thanks for sharing :)
ReplyDeleteHave a great weekend!!
Lluisa x
You're welcome Lluisa!
DeleteHope you have a great weekend too!
Kate :}
I must do this till 14th for my BigBrightBlanket!
ReplyDeleteWonderful heart!!!
Im in love! This is gorgeous and I love your color choices. You really do nice tutorials.
ReplyDeleteGreat block. Great tutorial. Love those half square triangles.
ReplyDeleteVery pretty! Thank you for the great tutorial! You make things look so easy. I'll have to add this to my growing to-make pile :-)
ReplyDeleteThanks! If you try it and have any questions, let me know!
DeleteHope you're having a lovely weekend!
Kate :}
Kate, this is just fantastic! How do you come up with this??... such a brain teaser! ;)
ReplyDeleteI'm imagining a sweet blanket made with these heart squares.
hello kate, in my frenzy I forgot to actually comment! this is a really nice, signature piece that screams signed with an owl. i think i would know it was yours anywhere!! thank you sooo much for linking it to ffhf.
ReplyDeleteThis is beautifule!
ReplyDeleteThis is amazing! And so smart! I love it, definitely putting this on my to-do list. ♥♥
ReplyDeleteMuchas gracias y de nada!!
ReplyDeleteI hope you have a great weekend!
Kate :}
Thanks for sharing this technique with very detailed pics:) I saw a pillow using this and was searching for the way to do it:) Going to use black and white! Will start right away:) Thanks so much!
ReplyDeletewas looking for the pin it icon but can't find it:(
ReplyDeleteThis is my first time seeing your blog and I came due to the fabulous heart square which I plan to make... it looks perfect and I love it already!!! Thanls for a great pattern!! Barbara L in NJ
ReplyDeleteThank you so much and you're welcome!!
DeleteHappy crocheting!!
Kate :}
Thanks, I link you in my blog, DIVERSIDADES
ReplyDeleteLove you too Kate! Your work is awesome. Regards, Merry Christmas and a Happy New Year from Pakistan!
ReplyDeleteMaria
Thank you so much Maria!
DeleteHope you had a lovely New Year and happy crocheting!
Kate :}